Sewing in the Simplicity Summer Tote Sew-A-Long
This summer I have taken part in two sew-a-longs with Simplicity on Facebook. One was a zippered skirt sew-a-long and one was a summer tote sew-a-long. They were both great and I really enjoyed them. The camaraderie between the members is fantastic and everyone is so very encouraging.
 For the simplicity summer tote we used pattern number 2396 view C or D. You really could use any Simplicity or New Look pattern that you wish. And some did use a different pattern or a different view of the chosen pattern.
The tote was very simple to make and really took less then a day to finish, but since there are so many different levels of ability in those participating, Simplicity tries to carry it over several weeks with lots of tips and videos.
 Everyone is so helpful and encouraging. It really is a share and love fest! LOL
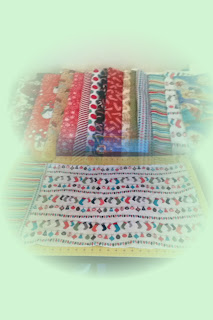
The tote is a patchwork that is laid out on fusible quilt batting and fused in place and then stitched down while applying bias tape to the edges of each block of fabric. The sides are then sewn together and the outside of the tote is then laid aside and the assembly of the lining begins next.
 After applying fusible interfacing to the wrong sides of both of the lining pieces, the pocket is stitched in place on the right side of one of the lining pieces. Use the markings that were made as you followed the directions while cutting and assembling the pattern pieces and the fabric. Next

 You will attach the magnetic closure to each side of the the lining pieces by pushing the prongs through to the wrong side of the fabric and then pressing them down firmly. Sew the lining pieces together along all sides with right sides together leaving an opening to turn along the lower edge of lining.

The handles themselves are pretty self explanatory, just follow the directions on the pattern instruction sheet. The tabs that hold the o rings for the handles are made from the left over bias tape that you used on the front and back to stitch the patch pieces down and are sewn by matching the raw edges together with the top of the outside front of the tote(just make sure these line up with the bias tape stitched on the front and back of the tote, see photo below) and then placing the tote inside the lining with right sides together stitch all along the top of the tote. Turn right side out through the opening along the bottom of the lining and whip stitch the opening closed. Stuff the lining inside the tote. Top stitch along the top of the tote about 1/4 inch from the edge. Slide the handles through the rings and stitch down on each end. And the tote is complete!


The sew-a long really was a lot of fun and I loved the tote. I plan to make some as Christmas gifts using some Christmas fabric. Maybe I will add a few more pockets on the inside and also add one on the lower part of the front. Fat Quarters can be used for the outside patches and that makes it even faster to cut out. Speed and cost make it a great gift idea!
All in all The Simplicity Sew-A-Long was a great sewing and social experience. If you are interested in being a part of the next one, just "like"Simplicity on Facebook and watch for the next sew-a-long post!
Happy sewing!
The tote was very simple to make and really took less then a day to finish, but since there are so many different levels of ability in those participating, Simplicity tries to carry it over several weeks with lots of tips and videos.
 Everyone is so helpful and encouraging. It really is a share and love fest! LOL
The tote is a patchwork that is laid out on fusible quilt batting and fused in place and then stitched down while applying bias tape to the edges of each block of fabric. The sides are then sewn together and the outside of the tote is then laid aside and the assembly of the lining begins next.


 You will attach the magnetic closure to each side of the the lining pieces by pushing the prongs through to the wrong side of the fabric and then pressing them down firmly. Sew the lining pieces together along all sides with right sides together leaving an opening to turn along the lower edge of lining.
The handles themselves are pretty self explanatory, just follow the directions on the pattern instruction sheet. The tabs that hold the o rings for the handles are made from the left over bias tape that you used on the front and back to stitch the patch pieces down and are sewn by matching the raw edges together with the top of the outside front of the tote(just make sure these line up with the bias tape stitched on the front and back of the tote, see photo below) and then placing the tote inside the lining with right sides together stitch all along the top of the tote. Turn right side out through the opening along the bottom of the lining and whip stitch the opening closed. Stuff the lining inside the tote. Top stitch along the top of the tote about 1/4 inch from the edge. Slide the handles through the rings and stitch down on each end. And the tote is complete!


All in all The Simplicity Sew-A-Long was a great sewing and social experience. If you are interested in being a part of the next one, just "like"Simplicity on Facebook and watch for the next sew-a-long post!
Happy sewing!

Comments