My Version of the Cutest Little Pin Cushion Ever!!
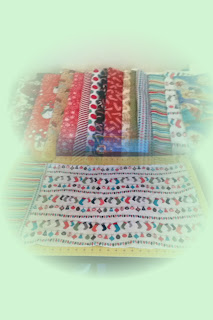
 Thanks to Lori at Monkeyroom,( my blog post from July 3rd) I found the pincushion I had been looking for. After reading her tutorial, I was hooked and had to try one and put my spin on it. I pretty much followed her directions, but I used a ribbon to hold the thread and I also placed a pocket on the bottom to hold a pack of sewing needles.


I found the center of the circle and the center of the pocket piece and matching the centers, I pinned in place. I then sewed the pocket to the right side of one of the fabric circles( I did this before attaching the 2 circles via bias tape.) Keep in mind the pocket will be on the bottom, so if you are using different fabrics for the top and bottom, be sure to apply to a bottom piece circle. I used a decorative stitch to attach the pocket and then pressed well. Before sewing on the bias tape, I glued the two circles together with a fusible glue, this step makes it easier for me to stitch the bias tape without fear of the two pieces slipping out of place. I used 1/2 inch single fold bias tape folded over and pressed. Starting at one end of the bias tape, I placed the circles inside and stitched close to the inside edge of the tape. when I got back around to the beginning I overlapped the tape and secured with a bartac(using the stitch for sewing on buttons).

Next I used the template I made to mark where the inner stitching line will be. I made it 2 inches from the edge. This will be stuffed with cotton batting and will create the pincushion. I stitched around this marked line leaving about a 3 inch opening.(You need an opening to place the batting into the center of the cushion) Then used my quilting grid to divide the circle into 8 sections. On each section line, I marked where I wanted the bartacs to go. Two on each dividing line, one above the other, about 1/2 inch apart. ( The ribbon or elastic holding the spools of thread will go between these bartacs. Using the stitch I use to sew on buttons, I made these bartacs before filling with the batting.

I then used a chopstick to push the batting in good and tight. Finished the seam to close the opening and added the thread. I used small spools that I purchased for less then a dollar a piece. It was a little more expensive then the ones that come in the sewing kits but since this is going to be a game prize for a bridal shower I am hosing, I wanted it to be extra special. I added each spool of thread by first placing the ribbon or elastic through the middle of the spool and then through each set of bartacs, I then pulled the ribbon(or elastic) tight and tied in a pretty bow. (The elastic I used a safety pin to secure the ends.) Like Lori at the Monkeyroom, I too used white and black at the ends of the ribbon for ease of changing these often used colors. I also found that threading each end of the ribbon or elastic through the opposite bartacs of the opposite ends, made a nicer looking finish.

Happy Sewing!


Comments